
Digital signage content doesn’t have to be complicated. OptiSigns is a user-friendly platform that allows you to create, schedule, and publish dynamic ads for your LED displays.
Whether you’re a small business promoting daily deals or a large organization sharing important updates, this guide will walk you through the basics—from logging in to the software to publishing your first ad. Let’s get started!
Logging into OptiSigns
The first step to managing your LED display content is accessing the OptiSigns platform. Follow these simple instructions:
- Open the Login Page
- Launch your web browser and navigate to the OptiSigns login page: https://app.optisigns.com.
- Enter Your Credentials
- Type in your username and password in the respective fields.
- Click the Login button to access your account.
- Troubleshooting Access
- If you don’t have login credentials, contact your administrator or the person who manages your signage account for access.
- Forgotten your password? Click the Forgot Password link to reset it.
- Explore the Dashboard
- After logging in, you’ll land on the OptiSigns dashboard. This is the central hub where you can access all the tools you need to create and manage content.

Pro Tip: Bookmark the login page for quicker access in the future.
Navigating the Dashboard
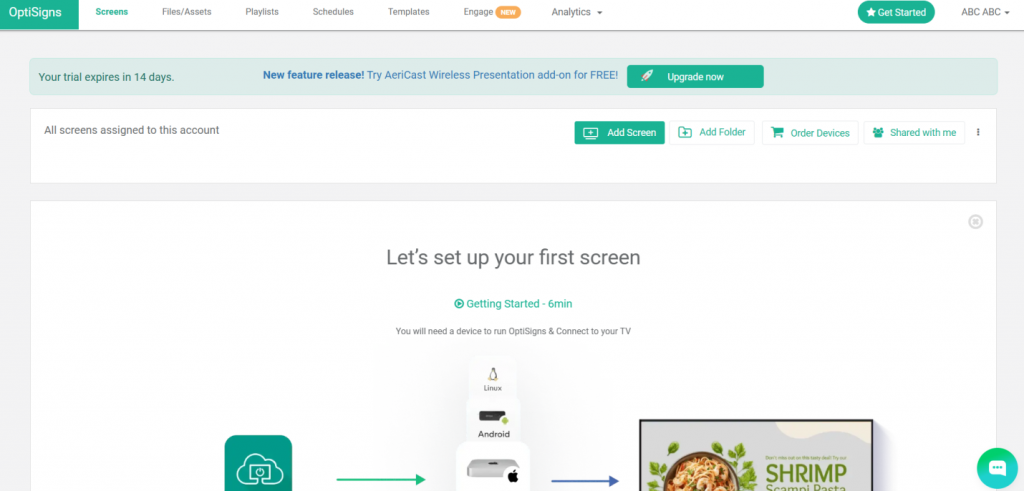
Once you log in, you’ll arrive at the OptiSigns dashboard. This is your starting point for managing screens, uploading content, and scheduling ads. The interface is clean and user-friendly, with all essential features accessible from the top navigation bar.
- Overview of the Dashboard
- The dashboard displays a prompt to set up your first screen if no devices are connected yet. This helps new users quickly get started.
- Key action buttons such as Add Screen, Add Folder, and Order Devices are prominently displayed at the top.
- Top Navigation Bar
- Screens: Manage all your connected displays here.
- Files/Assets: Upload and organize media files (images, videos, etc.) for your ads.
- Playlists: Group content into playlists for smoother scheduling.
- Schedules: Assign specific times for your content to play on selected screens.
- Templates: Browse pre-designed templates for creating content quickly.
- Engage: Explore advanced features for interactivity.
- Analytics: View performance data to measure engagement with your displays.
- Helpful Guides
- The dashboard includes a Getting Started section with a 6-minute tutorial, making it easy for beginners to learn how to set up their first screen.
- Trial Period Notification
- A banner at the top reminds users of their trial status and offers an upgrade option for premium features.
Pro Tip: Use the Add Folder feature to organize your content if you’re managing multiple campaigns or media files.
File/Assets
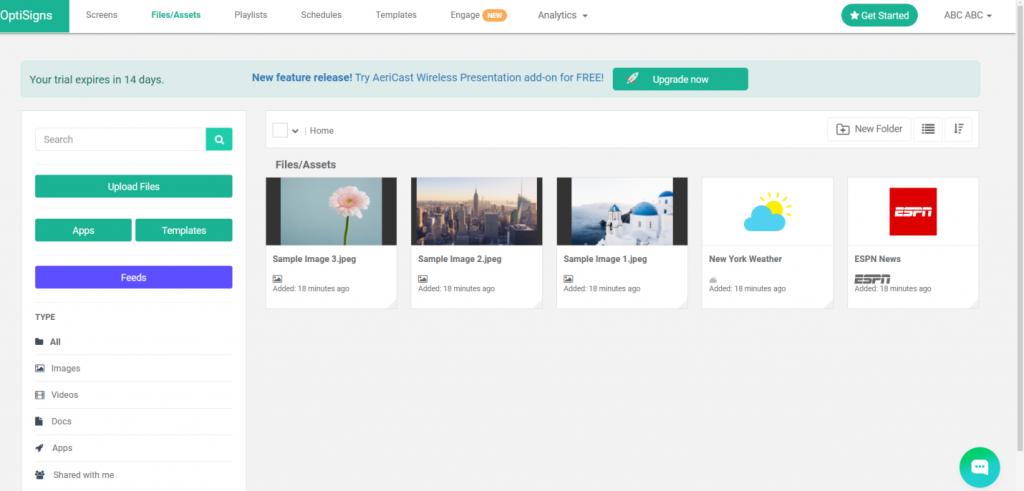
The Files/Assets tab in OptiSigns is your central location for managing and organizing the media content you want to use in your LED display ads. Here’s a detailed breakdown of what you can do in this section, as shown in the screenshot:
1. Search and Filter Options
- Search Bar: Use this to quickly find specific files by their name or type.
- Filters: Narrow down content by selecting categories such as Images, Videos, Docs, or Apps. This helps you efficiently locate files without scrolling through all your assets.
2. Uploading Files
- Click the Upload Files button on the left to add new media, including images, videos, or documents, to your library. This is where you bring in your brand assets or any creative elements you want to display.
3. Using Pre-Built Options
- Apps: Access interactive content or widgets (like weather or news feeds).
- Templates: Choose from pre-designed templates to create professional-looking ads with minimal effort.
- Feeds: Integrate real-time feeds such as social media updates or news to keep your display dynamic.
4. Viewing and Managing Files
- All uploaded or integrated files appear in the Files/Assets section in the main panel.
- Thumbnails: Each file is displayed as a thumbnail with its name and the time it was added, making it easy to visually identify your content.
- Example assets include:
- Images: Sample Image 1, 2, 3 (flower, cityscape, travel).
- Feeds: “New York Weather” and “ESPN News” (interactive or live updates).
5. Organizing Content
- New Folder: Use this feature to create folders and organize your files systematically. This is particularly useful for managing large-scale projects or multiple campaigns.
Pro Tip
Regularly organize your assets into folders or by type to keep your workflow smooth, especially if you’re working with multiple campaigns or seasonal promotions.
This tab simplifies your content management process, ensuring you have quick access to all your media and tools for creating stunning LED display ads.
Playlist
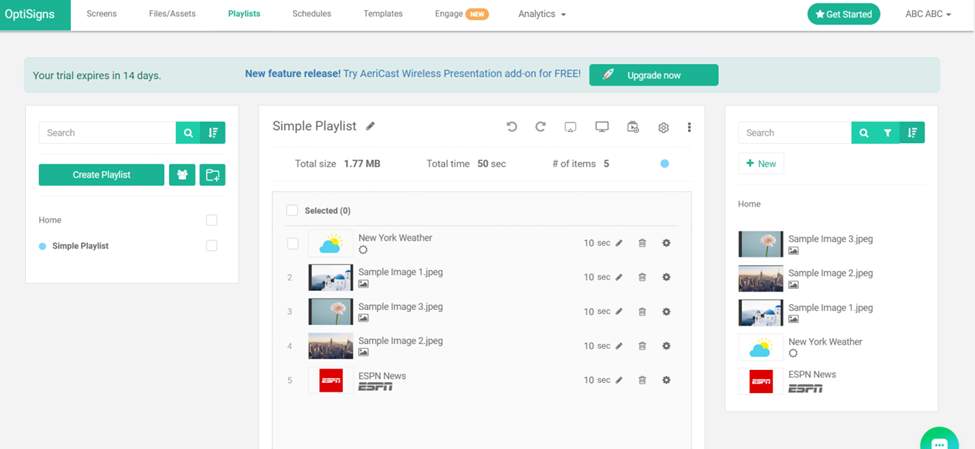
The Playlists tab in OptiSigns is used to organize and sequence media content for display. Here’s a brief explanation based on the screenshot:
1. Playlist Creation
- Create Playlist: Use this button to create a new playlist for your digital signage. Playlists allow you to combine various media types (images, videos, apps) in a specific order.
2. Playlist Details
- In this example, the playlist is named Simple Playlist.
- Total Size: The total storage size of all files in the playlist (1.77 MB in this case).
- Total Time: The total duration of the playlist (50 seconds).
- Number of Items: Indicates the number of assets in the playlist (5 items here).
3. Playlist Items
- Each media item in the playlist is listed with details:
- Order: Items are numbered based on their sequence (e.g., New York Weather is first).
- Duration: Each item has a set duration (e.g., 10 seconds per asset).
- Actions:
- Edit (pencil icon): Modify item duration or settings.
- Delete (trash icon): Remove the item from the playlist.
4. Media Library
- The right panel shows your available media files from the Files/Assets tab.
- Drag and drop media into the playlist to add them.
- Use the + New button to upload additional media directly.
This tab is essential for curating content and managing the sequence of media playback for your digital signage displays.
Schedules
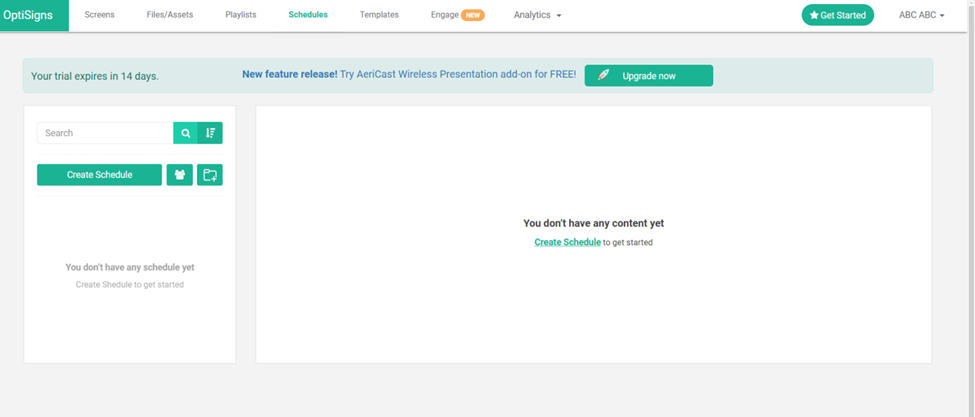
The Schedules tab in OptiSigns allows users to create and manage schedules for displaying content. You can create a schedule to determine when and where specific content, such as playlists or individual files, will appear on connected screens. Since the screen shows “You don’t have any content yet,” it seems no schedules have been created yet. To get started, click on the Create Schedule button. This will guide you through setting up a new schedule with time slots, days, and assigned content.
Templates
The Templates tab in OptiSigns provides a variety of pre-designed templates that can be customized and used for digital signage. Templates are organized into categories such as Holidays and Observances, Seasonal Promotions, Menu, and more. Users can select a template, edit it to fit their needs (e.g., add text, images, or logos), and then apply it to their screens or playlists. The tab also allows for creating a New Design from scratch or managing Your Designs for personalized content.
Engage
The Engage tab in OptiSigns is designed to create interactive digital experiences for customers. It includes tools like:
- Touch Screen Kiosks: Enable interactive displays through touch screens or kiosks.
- QR Overlay: Add custom QR codes to your content for sharing links, videos, or other resources.
- Lift and Learn: Use IoT sensors to display information when a product is lifted.
- Explore More: Includes features like live TV overlays, AI cameras, and IoT sensor integration.
This feature requires the Engage plan, but a trial is available for one device. You can create new interactive apps or manage existing ones.
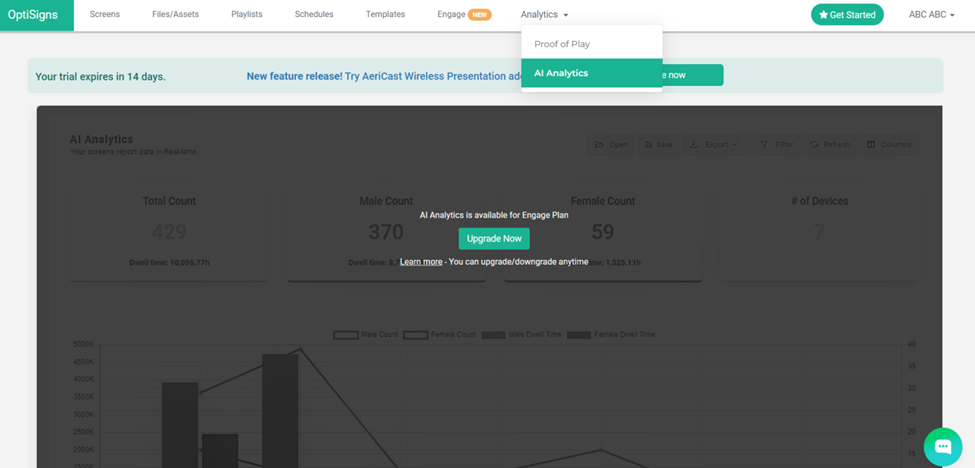
Analytics
The Analytics tab in this interface provides insights into the performance of your screens. It includes features such as:
- AI Analytics: Offers detailed data like gender-specific counts (e.g., Male and Female Counts), total dwell time, and the number of devices reporting. This is available as part of the Engage Plan, requiring an upgrade.
- Proof of Play: Tracks content playback on screens, ensuring content accountability.
Additional tools (such as filtering, exporting, or saving reports) are also available to manage and analyze data efficiently.
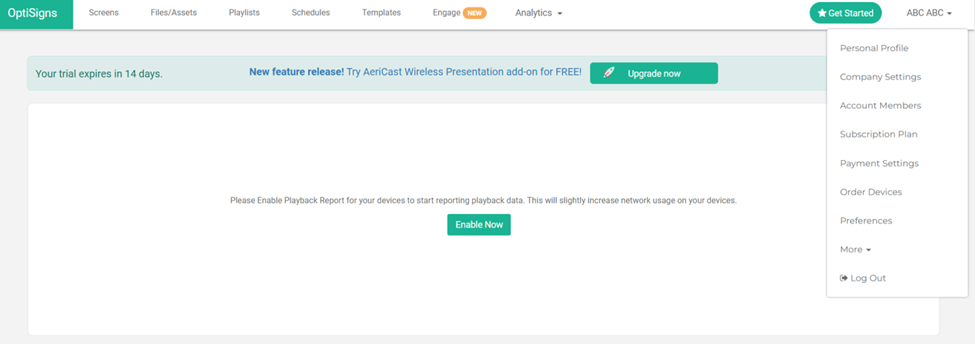
Profile Drop Down Menu
The dropdown menu on the right side provides access to account-related settings and options. Here’s a breakdown:
- Personal Profile: Allows users to manage their personal account details, such as name, email, and password.
- Company Settings: Contains options to configure company-level settings, such as branding or global preferences.
- Account Members: Used to manage team members, including adding, removing, or assigning roles.
- Subscription Plan: Displays details about the current subscription and options for upgrading or modifying the plan.
- Payment Settings: Provides access to billing details and payment methods.
- Order Devices: Allows ordering or managing compatible hardware for the platform.
- Preferences: Includes user-specific settings for customization and notifications.
- More: Likely includes additional settings or tools for advanced configuration.
- Log Out: Signs the user out of their account securely.
Each option is tailored to managing different aspects of the account and usage efficiently.
Conclusion
OptiSigns simplifies digital signage management with its intuitive platform, allowing users to create, schedule, and publish engaging content for LED displays. From uploading media in the Files/Assets library to organizing playlists, scheduling content, and using pre-designed templates, the platform streamlines the entire workflow. Interactive tools and analytics enhance engagement and performance tracking, while the profile dropdown menu provides easy access to account and subscription settings. Whether for small businesses or large organizations, OptiSigns is an efficient solution for impactful digital communication.